SuperDuper is a data recovery and backup tool on the Mac OS X platform,It can help you recover accidentally deleted files on your computer,Even restore data you lost after formatting。
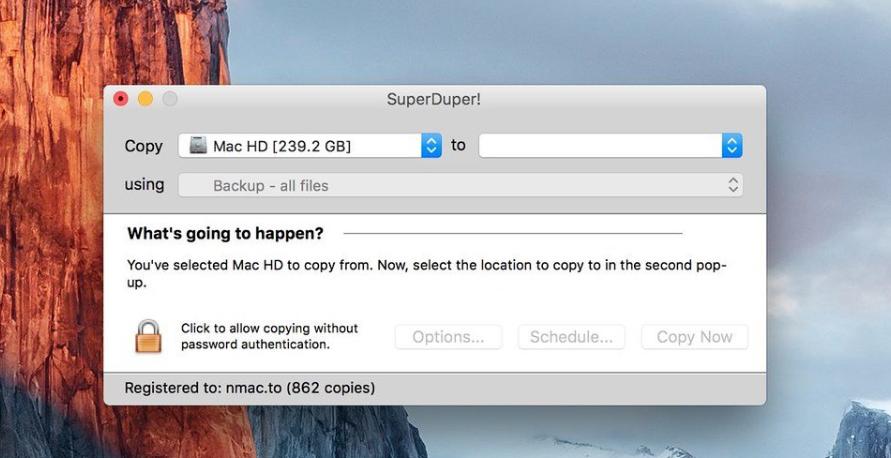
SuperDuper! Ability to back up system partition or single/multiple files under Mac OS X system,Partition files backed up by it can be started directly by booting。
Take advantage of SuperDuper! The advantage of a backup system is that it only copies the files in the system partition rather than copying the free space along with it.,This is just compared to the backup of ghost,Dramatically reduces backup file size。
If you want to transfer your Mac data from one computer to another or just make a simple backup,SuperDuper can come in handy。It can directly copy or "clone" files,Provide data recovery,Even if the operation is wrong,You can also get back to work immediately。It can also help recover accidentally deleted files,甚至格式化后丢失的数据都可以帮忙找回来哦~~
激活方法
use CORE Keygen.app or CRACK.app or SN.txt activation
statement:All articles on this site,If there is no special instructions or markings,All are originally published by this site。any person or organization,Without the consent of this website,Reproduction prohibited、Misappropriate、collection、Publish content from this site to any website、Books and other media platforms。If the content on this site infringes upon the legitimate rights and interests of the original author,You can contact us for processing。
Can free downloads or VIP membership resources be used directly for commercial use?
The copyright of all resources on this site belongs to the original author,The resources provided here are for reference and study purposes only.,Please do not use it directly for commercial use。If copyright disputes arise due to commercial use,All responsibility lies with the user。For more instructions, please refer to VIP introduction。
It prompts that the download is complete but cannot be decompressed or opened?
The most common situation is an incomplete download: You can compare the capacity of the downloaded compressed package with the capacity on the network disk,If it is less than the capacity prompted by the network disk, this is the reason。This is a browser download bug,It is recommended to download using Baidu Netdisk software or Thunder。 If this situation is excluded,You can leave a message at the bottom of the corresponding resource,or contact us。
Can't find the sample image in the material resource introduction article?
For members only、Whole site source code、Program plug-in、website template、Web page templates and other types of materials,The pictures used for introduction in the article are usually not included in the corresponding downloadable material package.。These related commercial images need to be purchased separately,And this site is not responsible for(There is no way)find source。 The same is true for some font files,However, some materials will have a list of font download links in the material package.。
The download address cannot be displayed or the content cannot be viewed after payment?
If you have successfully paid but the website does not pop up a success prompt,Please contact the webmaster to provide payment information for you to process
After purchasing this resource,Can I get a refund?
Source code materials are virtual goods,replicable,Transmissibility,once granted,No refunds of any kind will be accepted、Exchange request。Please confirm before purchasing to obtain the resources you need.
Comments (0)
Note: Please be respectful and civil in your comments Cancel reply
Computers are almost indispensable in our daily lives,And network connection is an important part of daily work and entertainment。For users using Windows systems,The disconnect may simply disable local connections。But for novices who have just come into contact with Mac,how to get it right、Easily disconnecting your Mac from the Internet may still be a mystery。don’t worry,Here are some simple and practical methods for disconnecting Mac computers from the Internet.,Allows you to easily disconnect from the network。 Method one:Use the network settings that come with the Mac system. Click the Apple icon in the upper left corner of the screen.,Select "System Preferences"。 in the pop-up window,Click "Network"。 In the list of network connections on the left,Select the network connection you want to disconnect (such as Wi-Fi or Ethernet)。 Click the "Advanced" button in the lower right corner。 in the pop-up window,Select the TCP/IP tab,Then click the "Configure IPv4" drop-down menu in the lower left corner,Select "Turn off IPv4"。 Click "OK" to save settings,Your Mac will disconnect from the network。 Method two:Use shortcut keys to quickly disconnect from Wi-Fi if you just want to disconnect from Wi-Fi,You can use shortcut keys for quick operations。Press Option + Click the Wi-Fi icon in the upper right corner of the screen,A menu will pop up,Select "Disconnect from Wi-Fi"。 Method three:Use third-party network management tools in addition to the network settings that come with the Mac system,You can also choose to use third-party network management tools to manage network connections more flexibly。These tools usually offer more features and options,Can meet your more complex network needs。You can search for network management tools suitable for your Mac computer in the App Store or online。 Through the above methods,I believe you have mastered how to easily disconnect your Mac computer from the network。Whether you need to disconnect from Wi-Fi or other networks,You can choose the appropriate method according to your own needs。Remember to reconnect to the Internet when needed!
WiFi Explorer Pro is a professional version of WiFi Explorer running on the Mac platform,Can help users monitor and troubleshoot wireless networks,Also has information element decoding、Annotations and custom colors、Spectrum analysis integration、Enhanced filtering and other useful functions。 WiFi Explorer Pro uses the code base of WiFi Explorer,and added a set of features,Making it the right tool for WLAN and IT professionals。You can use WiFi Explorer Pro for a preliminary evaluation,Help design and verify wireless network installation,and identify channel conflicts、overlapping、Poor signal quality and other issues that may affect your home、Connection or performance issues with your office or business wireless network。 Features Passive directional scan mode Spectrum analysis integration Custom filters Support for remote sensors Support for networks with hidden SSID Additional columns with advanced information Additional organization options for scan results Dark vs. light themes
Axure RP is the flagship product of the American Axure Software Solution company,Is a professional rapid prototyping tool,Let's take responsibility for defining requirements and specifications、Experts in designing functionality and interfaces can quickly create wireframes of applications or web sites、flow chart、Prototype and specification documentation。 As a dedicated prototyping tool,It is better than general tools for creating static prototypes such as Visio、Omnigraffle、Illustrator、Photoshop、Dreamweaver、Visual Studio、FireWorks needs to be fast、Efficient。 Axure RP can help website designers,Quickly and easily create annotated page diagrams based on website architecture diagrams、Operation flow chart、and interaction design,And can automatically generate web page files and specification files for demonstration,to provide demonstration and development。 Axure RP Pro features include sitemaps、process design、Page frame design、Simple interaction design, etc.,Can generate HTML、Word and other formats。 RP operation is much simpler than using Dreamweaver,picture、character、All components such as input boxes are all visual operations,It can easily realize the prototype design of website interactive content.,All previously rigid page layouts can be replaced with clickable、Link effect web page!At the same time, it can provide AJAX-style interactive processing for website design.,RP provides a dynamic layer component,Set effects for different states on the same page,Then use the link、Buttons and other triggers can produce dynamic effects,This way the website design becomes more vivid,The intention is more intuitive。 Detailed instructions for installing Axure RP 1. Download and prepare the installation package ➡️ Download the installation package:First put Axure RP 9.0.0.3727 Download the software RAR archive to your Mac,Usually found in the "Downloads" folder。 ➡️ Make sure the file is not damaged,The sizes are almost right (don’t let the lower half break)。 ➡️ Decompress the RAR compressed file to obtain the DMG installation file and registration code information file,If you don’t have decompression software on your MAC computer,You can install this KeKa 1.4.3 Chinese cracked version(Simple and powerful decompression tool) Decompression software,relatively easy to use,Commonly used compression formats are supported。 2.Start installation ➡️ Double-click to open .dmg...
Mac computer is a very efficient device,Provides many tips to simplify and speed up operations。sometimes,Users need to quickly copy files to multiple different locations,This process can be easily accomplished with a mysterious trick on your Mac。 Use Mac Automation for quick file copies Turn on Automation Click "Launchpad",Find and open the Automator application。 Create new workflow in automated actions,Select "Workflow" and click "Select"。 Configure workflow Select "Files and Folders" in the "Resource Library" on the left,Drag and drop "Get specified Finder item" into the blank pane on the right。 Then from the same repository,Drag and drop "Copy Finder Item" multiple times into the right pane,Set different target locations separately,such as desktop、Download folder、Manuscripts, etc.。 Run the workflow. Drag and drop the files or folders that need to be copied into the "Get Specified Finder Items" pane.。 Click the "Run" button in the upper right corner,Workflow will quickly copy files to multiple locations of your choice。 Check the operation results after the operation is completed,The prompt "Workflow Completed" will be displayed at the bottom of the automation window.。 Open each setting location,Confirm that the file was copied successfully。 Create shortcuts for reuse Save workflows Clear files or folders in the Get Specified Finder Items pane。 Select "File" in the menu bar > "storage",Name the workflow and choose where to save it。 Select the file format as "Workflow" and save it,This creates a reusable shortcut。 Use shortcuts the next time you need to perform the same action,Simply click on the saved workflow to quickly open the automatic operation and perform the above file copy operation.。 With these simple steps,You can easily batch copy files to multiple locations with the Automator app on your Mac,thereby greatly improving work efficiency。You can also explore more automation operations,Customize tips and tools to fit your workflow。
In our daily design work,such as advertising、Photography watermark、quotation、album cover、book cover、product design、sign、business card、logo、brand、Magazine and social media copywriting, etc.,Choosing the right font is crucial。Let’s learn how to install fonts on Mac。 Mac font installation tutorial Download font files: First make sure you have downloaded the required OTF (OpenType Font) or TTF (TrueType Font) font file。 Method one:Install using Font Book Open "Font Book" on your Mac: Find and click the "Font Book" app in the launcher。 Add font: In the menu bar of the font book,Select "File" > "Add font"。 Or directly click the "+" button above the font book window。 Navigate to the font file location: Find the font file you downloaded,and click "Open"。 Complete installation: Mac automatically installs selected font files,After the installation is complete, the font can be used in the application.。 Method two:Double-click to install. Double-click the downloaded font file directly.。 In the font preview window that opens,Click "Install Fonts"。 Follow the simple steps above,You can easily install and use your favorite fonts on your Mac,to highlight your design style。
Apple recently issued a reminder to macOS users,New macOS versions will no longer be compatible with 32-bit apps。When users enable 32-bit apps on macOS High Sierra 10.13.4,The system will pop up a prompt:"This app needs to be updated by its developer to improve compatibility。” Due to software update issues,There are still some 32-bit applications on many Macs,These apps will be unavailable after future system upgrades。Here's how to find out if your Mac software is 32-bit or 64-bit: The easiest way to see if your Mac software is 32-bit or 64-bit The easiest way to see all 32-bit and 64-bit applications on your Mac is to use System Information: 1. Hold down Option on your keyboard / Alt key,Then click on the Apple menu。 2.Select "System Information" from the top of the Apple menu list。 3.In the System Information application,Scroll down left menu,Then look under "Software" and select "Applications"。 4.Look for the "64-bit (Intel)" option in the column headers。This column will show the number of bits in the application。
QuickTime Player is a pre-installed application on Mac systems,The main function is to play videos,But it can also be used to edit audio。So how to use QuickTime Player to cut and edit audio? This article will introduce the use of Mac’s built-in audio editing software。 1.Open QuickTime Player and click on the launch pad at the bottom of the screen,Select the system's built-in playback software QuickTime Player and open it。 2.Import audio files Drag the audio files to be edited into QuickTime Player,Let go and move on to the next step。 3.Start editing After the audio file is opened,Find the "Edit" column in the menu bar at the top of the MacBook interface,and find "Trim..." from the drop-down menu。 4.Select the clip part and a golden edit box will appear in the QuickTime Player playback window.。Move the selector forward or backward,Move the left and right sides to the part that needs to be cropped。 5.Complete trimming After selecting the clipping part,Click the "Trim" button in the upper right corner of the page。 6.Save the edited audio After editing is complete,Click "File" on the top menu bar of your MacBook,Select "Storage" from the drop-down menu。In the pop-up information filling interface,After entering the relevant content, click the "Save" button in the lower right corner of the page.。 Go through the above steps,You can use QuickTime Player to easily complete audio editing operations。
AnyMP4 Video Converter Ultimate (Mac)It is a set of video conversion、edit、compression、All-in-one video converter with playback and other functions。It can convert 8K/5K/4K/1080p HD videos and DVDs to MP4、MP3、GIFs and over 500 digital formats,Its conversion speed is 70 times faster than ordinary converters。also,It can also use AI technology to edit、Compress and enhance video,Built-in media player can play any video file。The comprehensive functionality of this software makes it ideal for handling a variety of video needs。
On a Mac computer,By default, the mail client does not have the QQ mailbox option。If you need to use QQ mailbox,You need to add it manually。The following are the specific steps: 1. Open your mail client •Open your Mac computer,Find and open your mail client。 2. Select Add Account •On the email client page,Click "Mail" on the toolbar in the upper left corner,Select "Add Account..."。 3. Select QQ mailbox •Find and click QQ mailbox in the pop-up page。 4. Enter account information •In the pop-up email information window,Enter your email address and password,Click the "Login" button。If it prompts an error,Please follow the steps below to proceed。 5. Obtain the QQ mailbox authorization code •Open the web version of QQ mailbox,Click the "Settings" option above,Then select "Account"。 6. Start the service and obtain the authorization code •Find “Start Service”,Select "On",And follow the prompts to send a verification text message using your mobile phone.。After sending is completed,Click the "I Sent" button。 7. Enter the authorization code •Copy the authorization code shown on the left into the password box of your email client,Just click the "Login" button。 go through these steps,You can successfully add QQ mailbox in Mac mail client。
Tidy Up is the best duplicate file search and cleaning tool on Mac,This software allows you to specify the target directory to search for,Then search for duplicate files of the specified type,like music、picture、Application etc.,Also supports direct search of iTunes、iPhoto、Aperture, etc. There is always not enough space on the hard disk.。Usually the only thing I have to do is replace it and delete it.。Recommend a good software - Tidy Up!,It allows you to increase hard drive space without losing money or sadness.。 Function by sorting,You can use the owner application、content、type、Creator、Expand、modification time、Creation time、name、Label、Visibility and date/age to search for duplicate files and packages。You can also pass tags,duration,As well as MP3 and AAC audio files and EXIF metadata to search;Search photos、iPhoto、Aperture、- – iTunes、iPod database and mailbox contents;and with iPhoto, Mail and iTunes sync deletion。 Tidy Up comes with two search modes。Basic mode includes over 90 predefined searches。For customized strategies,You can choose to use the Policy Wizard to create appropriate criteria to search for replicas based on your selections。 Organizer has a built-in security system that guarantees you will copy at least one file to a group of disks,Revoke the ability to copy and move items,And can restore trash items as long as the trash is not emptied,Even if you restart your computer。 Organizes the most commonly used files providing a full-size preview,For example:Audio,media,text,PDF,graphics,Fonts and more… One of the most interesting features of finishing is,Can be separated by "smart basket"、Quick and easy organization,Find projects using custom criteria。It also includes items belonging to supported applications、specific album、Possibility of selection from playlist or mailbox。 Tidy Up allows you to discard、move、Replace moved or dropped items with aliases or symbolic links,combustion,Assign colored Finder labels,and export to HTML and text files。Tidy Up is fully customizable,Allows you to create the workspace you like。
In Mac system,You can easily unzip ZIP files,But for other compression formats such as RAR,The system cannot decompress directly by default。Here's how to unzip RAR on Mac、Methods for files in various formats such as ZIP: Decompress files such as RAR and ZIP Method 1:Using "The Unarchiver" software 1. Download and install "The Unarchiver" Open the App Store,Type "The Unarchiver" into the search box,Click "Get" and install the software。(if already installed,button says "Open") 2. Open The Unarchiver after installation is complete,You can find The Unarchiver icon in the Dock。Click to open the software。 3. Set up file associations after starting The Unarchiver,You can view supported compressed file formats in the app。You can also set The Unarchiver as the default decompression tool。 4.Unzip the file Find the RAR or ZIP file that needs to be unzipped,Right click on the file,Select "Open with",Then select "The Unarchiver"。The software will automatically start decompression。 5. View decompression results After decompression is complete,You can find the extracted files in the same location as the file。The contents of the folder will be displayed where the original file is located。 Method two:Through other decompression tools except The Unarchiver,You can also use other third-party decompression tools,Such as Keka or WinZip for Mac。These tools also support multiple compression formats,And the operation method is similar: 1. Download and install the required tools. Download and install the required decompression tools from the App Store or official website.。 2. Unzip the file using the tool Launch the tool,Usually you just drag and drop the compressed file into the tool window,Or right-click the file and select the appropriate tool to decompress it。 Through the above methods,You can easily unzip RAR on Mac、ZIP and other compressed files,Manage files conveniently and efficiently。
1. Show or hide the menu bar If the menu bar is not displayed,You can display it by following these steps: 1. Open system preferences:Click the Apple icon in the upper right corner of the screen,Select "System Preferences"。 2. Go to general settings:In the System Preferences window,Click "General"。 3. Adjust menu bar settings: •In general settings,Find and check the "Automatically hide and show menu bar" option。 After setting this,The menu bar will automatically hide and show,Display based on your mouse movement or window operation。 2. Adjust menu bar icons •Rearrange icons:Command-drag an icon on the menu bar,Their positions can be rearranged。 •Remove menu bar icon:Hold down the Command key,Then click on the icon you want to delete and drag,until a delete sign appears at the top of the screen。Release the mouse to delete the icon。 please note,The icons of some software may not be removed from the menu bar,This depends on the settings of the software itself。 With these simple steps,You can easily manage and adjust the display and icons of your Mac's top menu bar。
Comments (0)